Indepth Example#
In this page I will detail the way I created the reports that can be found in the examples directory.
Let’s start with the content of common.py, this file stores the
definition of an invoice that will be used to create the different reports. The
invoice is a simple python dictionary with some methods added for the sake of
simplicity:
from os.path import dirname, join


class Invoice(dict):

    @property
    def total(self):
        return sum(line['amount'] for line in self['lines'])

    @property
    def vat(self):
        return self.total * 0.21


inv = Invoice(customer={'name': 'John Bonham',
                        'address': {'street': 'Smirnov street',
                                    'zip': 1000,
                                    'city': 'Montreux'}},
              lines=[{'item': {'name': 'Vodka 70cl',
                               'reference': 'VDKA-001',
                               'price': 10.34},
                      'quantity': 7,
                      'amount': 7 * 10.34},
                     {'item': {'name': 'Cognac 70cl',
                               'reference': 'CGNC-067',
                               'price': 13.46},
                      'quantity': 12,
                      'amount': 12 * 13.46},
                     {'item': {'name': 'Sparkling water 25cl',
                               'reference': 'WATR-007',
                               'price': 4},
                      'quantity': 1,
                      'amount': 4},
                     {'item': {'name': 'Good customer',
                               'reference': 'BONM-001',
                               'price': -20},
                      'quantity': 1,
                      'amount': -20},
                    ],
              id='MZY-20080703',
              status='late',
              bottle=(open(join(dirname(__file__), 'bouteille.png'), 'rb'),
                  'image/png'))
Create a simple LibreOffice Writer template#
Let’s start with the simple template defined in basic.odt.
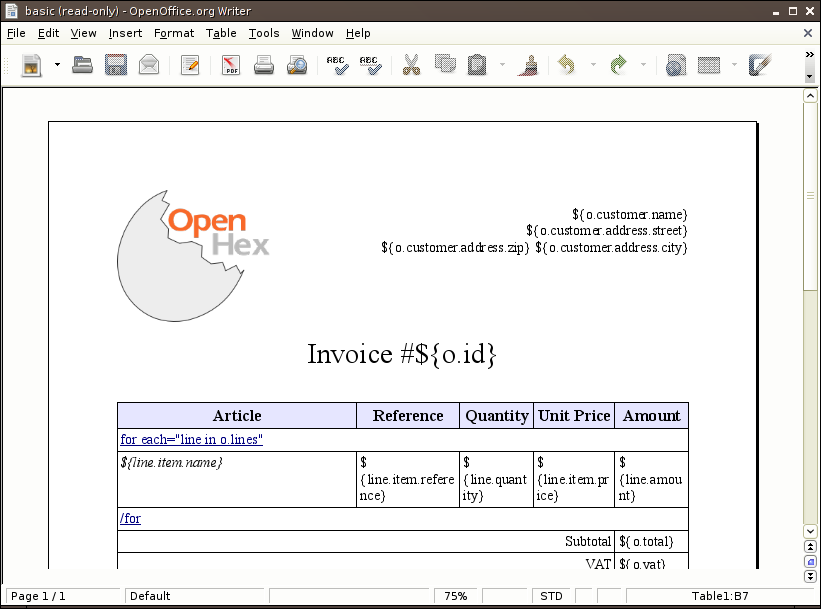
This report will be created and rendered with the following three line of code:
from relatorio.templates.opendocument import Template
basic = Template(source='', filepath='basic.odt')
file('bonham_basic.odt', 'wb').write(basic.generate(o=inv).render().getvalue())
Notice that the dictionary passed to generate is used to bind names to make
them accessible to the report. So you can access the data of the invoice with a
Text Placeholder containing o.customer.name. This is where you can see our
Genshi heritage. In fact, all reports using relatorio are subclasses of
Genshi’s Template. Thus you can use most of the goodies provided by Genshi.
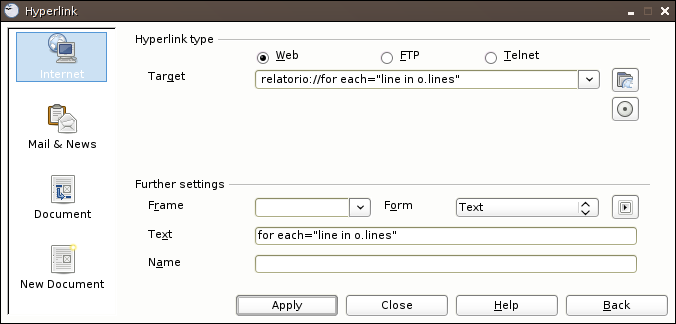
To iterate over a list you must use an hyperlink (created through
‘Insert > Hyperlink’) and encode as the target the Genshi expression to use.
The URL-scheme used must be relatorio. You can use whatever text you want
as the link text, but we find it way more explicit to display the Genshi code
used. Here is the example of the for loop.
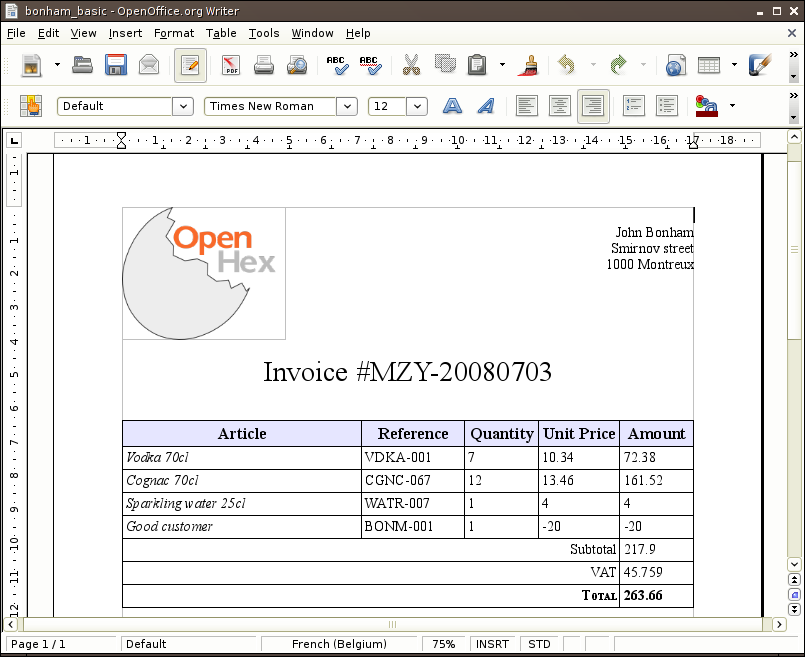
And thus here is our invoice, generated through relatorio:
Advanced zip options#
It can happen that the document being generated result in a file which uncompressed size is bigger than 2GiB. The default settings of Python’s zipfile library do not allow to generate those files.
To circumvent this issue, opendocument templates support additional parameters
to the generate method. Those parameters are:
- _relatorio_compresslevel:
This parameter defines the compresslevel parameter of the underlying Zipfile call.
- _relatorio_chunksize:
This parameter defines the size of each chunk of data streamed to the underlying Zipfile object.
- _relatorio_zip64:
This parameter forces the handling of ZIP64 extensions. It should be set to true if the size of the file may be bigger than 2GiB.
- _relatorio_compression_method:
This parameter defines the compression paramater of the underlygin Zipfile call.
One step further: LibreOffice Calc and LibreOffice Impress templates#
Just like we defined a Writer template it is just as easy to define a
Calc/Impress template. Let’s take a look at pivot.ods.
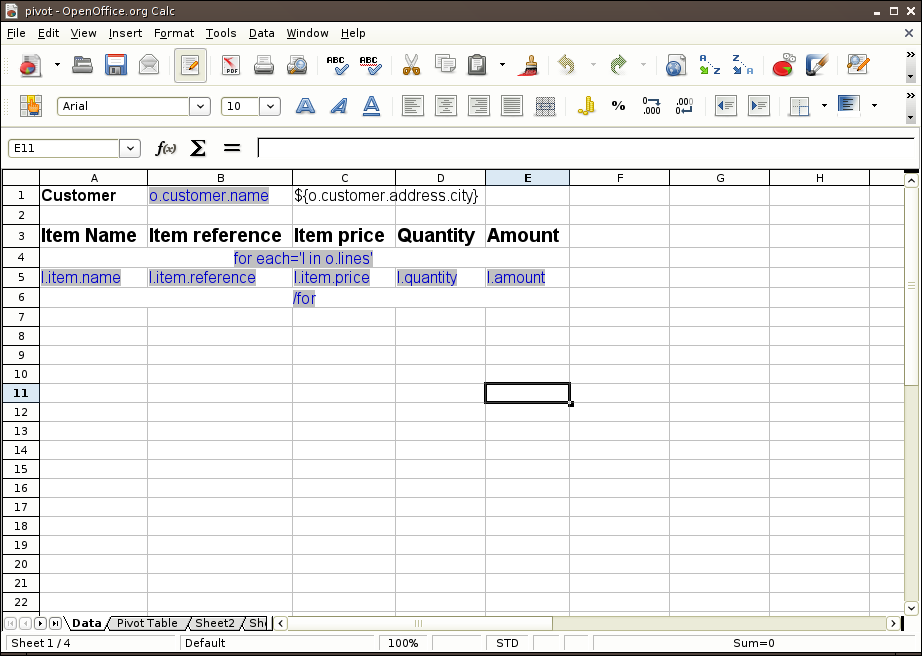
As usual you can see here the different way to make a reference to the content of the invoice object:
through the Text Placeholder interpolation of Genshi
or through the hyperlink specification I explained earlier.
Note that there is another tab in this Calc file used to make some data aggregation thanks to the data pilot possibilities of LibreOffice.
And so here is our rendered template:
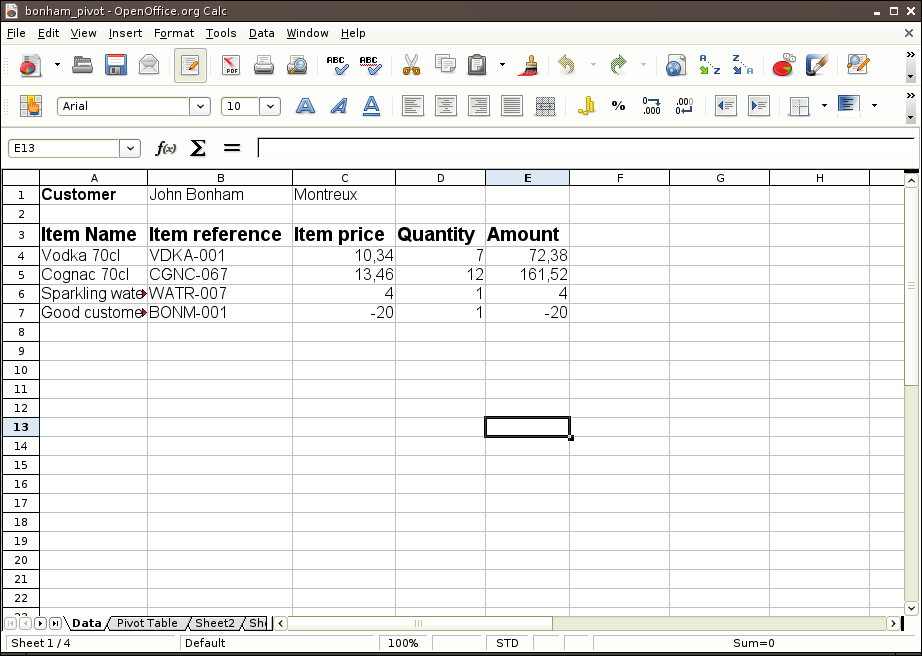
Note that the type of data is correctly set even though we did not have anything to do.
A (not-so) real example#
Now that we have everything to start working on our complicated template
invoice.odt, we will go through it one step at a time.
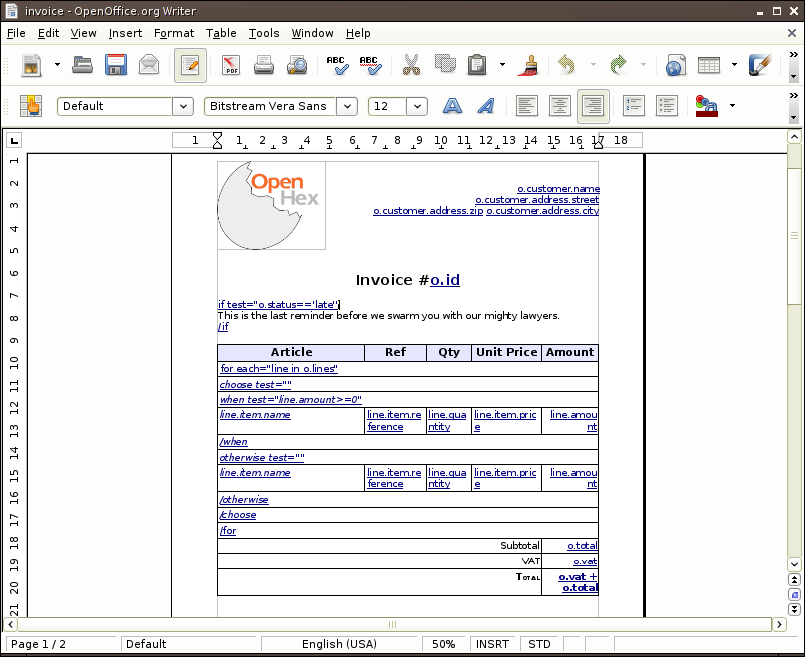
In this example, you can see that not only the libreoffice plugin supports the
for directive, it also supports the if directive and the choose directive
that way you can choose to render or not some elements.
The next step is to add images programmatically, all you need to do is to
create frame (‘Insert > Frame’) and name it image: expression just like in
the following example:
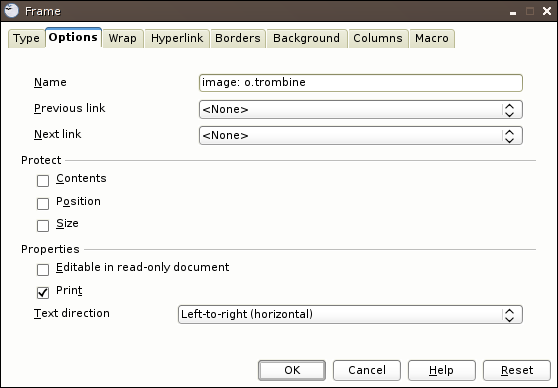
The expression when evaluated must return a couple whose first element is a
file object containing the image and second element is its mimetype. Note that
if the first element of the couple is an instance of relatorio.Report then
this report is rendered (using the same arguments as the originating template)
and used as the source for the file definition.
This kind of setup gives us a nice report like that: